|
Program profiles contain information on your sites and log files, filters, reports, as well as additional settings. The tutorial below
shows you how to create a profile for local log files. You can
also
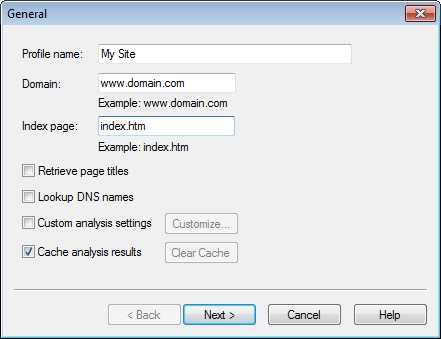
Creating a basic profile1.Click the New button in the main window to create a new profile. 2.Enter profile name, domain name and index page name:
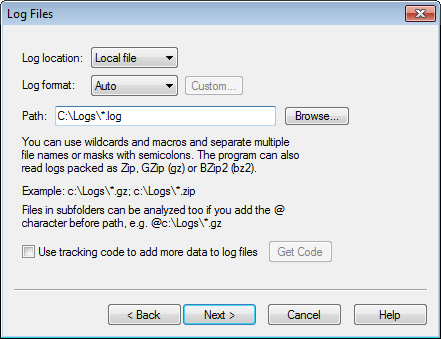
Profile name is the name of the profile displayed in the main window and in the analysis report. Domain name is the domain name of your site. Index page is the name of the index page that is displayed when a directory is requested directly like http://www.domain.com/dir/ 3.Enter the location of your log files:
You can use the Browse button to select a log file to be analyzed. You can also use wildcards like C:\Logs\*.log to analyze multiple logs at once. 4.Other profile properties may be kept unchanged. See also: | |||